Tuesday, December 13, 2011

Whole Wheat Sourdough Bread


Pin It

After about a month of....testing? I finally produced a good bread from my mother starter.  I kept trying to do the "purist" versions of the breads and it just wasn't working out for me, so I broke down and added some yeast and let the bread sit in the refrigerator for 3 days to let it mature and have a nice sour flavor.  I was so stoked when I tasted this bread because it is 100% whole wheat and tastes really really good.  So here is the recipe, keep in mind it does require a lot of patience because it takes almost two weeks to make it.  But once you get the system down, you can refrigerate batches to have at the ready and even freeze it.

Whole Wheat Sourdough Starter Ingredients:
2 oz. (1/4 c.) of mother starter (see previous starter recipe)
6 oz. (1 1/2 c.)whole wheat flour
4.5 oz. (1/2 c. plus 1 T.) warm water

Wheat Wheat Sourdough Ingredients:
sourdough starter (above)
1 oz. (1 1/2 T.) honey
12 oz. (1 1/2 c.) warm water
1/2 oz (2 T.) oil
10 oz. (3 1/2 c.) whole wheat flour
1/2 oz. (2 t.) salt
1 1/2 t. yeast

Mixing the starter:
On a clean surface, make a crater of the whole wheat flour.  Take the mother starter and break it up into a couple pieces, place pieces in the crater.  Add some of the water to the crater making sure it doesn't overflow.  Soften the mother starter pieces in the warm water by mixing gently with your fingers.

Begin bringing in the flour from the sides of the crater and slowly add in the rest of the water.  Until all the ingredients are mixed into a slightly sticky ball.

Place the starter ball into a clean, lightly oiled container, cover loosely with saran wrap, and leave the starter out to ferment for 6 to 8 hours until 1 1/2 times original size.  You can then either use the starter immediately or place it in the refrigerator for up to 4 days.  I let it ferment in the refrigerator to build more sour flavor.

Making the dough:
Pull the starter into a bunch of pieces (10-12) and places them into the bowl of a stand mixer fitted with the dough hook attachment.  Add the warm water, honey, and oil to the bowl and stir on low speed to soften. Next add in the flour, salt and yeast and mix until all ingredients are combined and form a crumbly dough.  Turn off the mixer and let the dough rest for 5 minutes.

After 5 minutes, turn the mixer to medium-low speed for 5 more minutes.  The dough should be slightly sticky and supple.  If the dough it too dry, add in a little water.

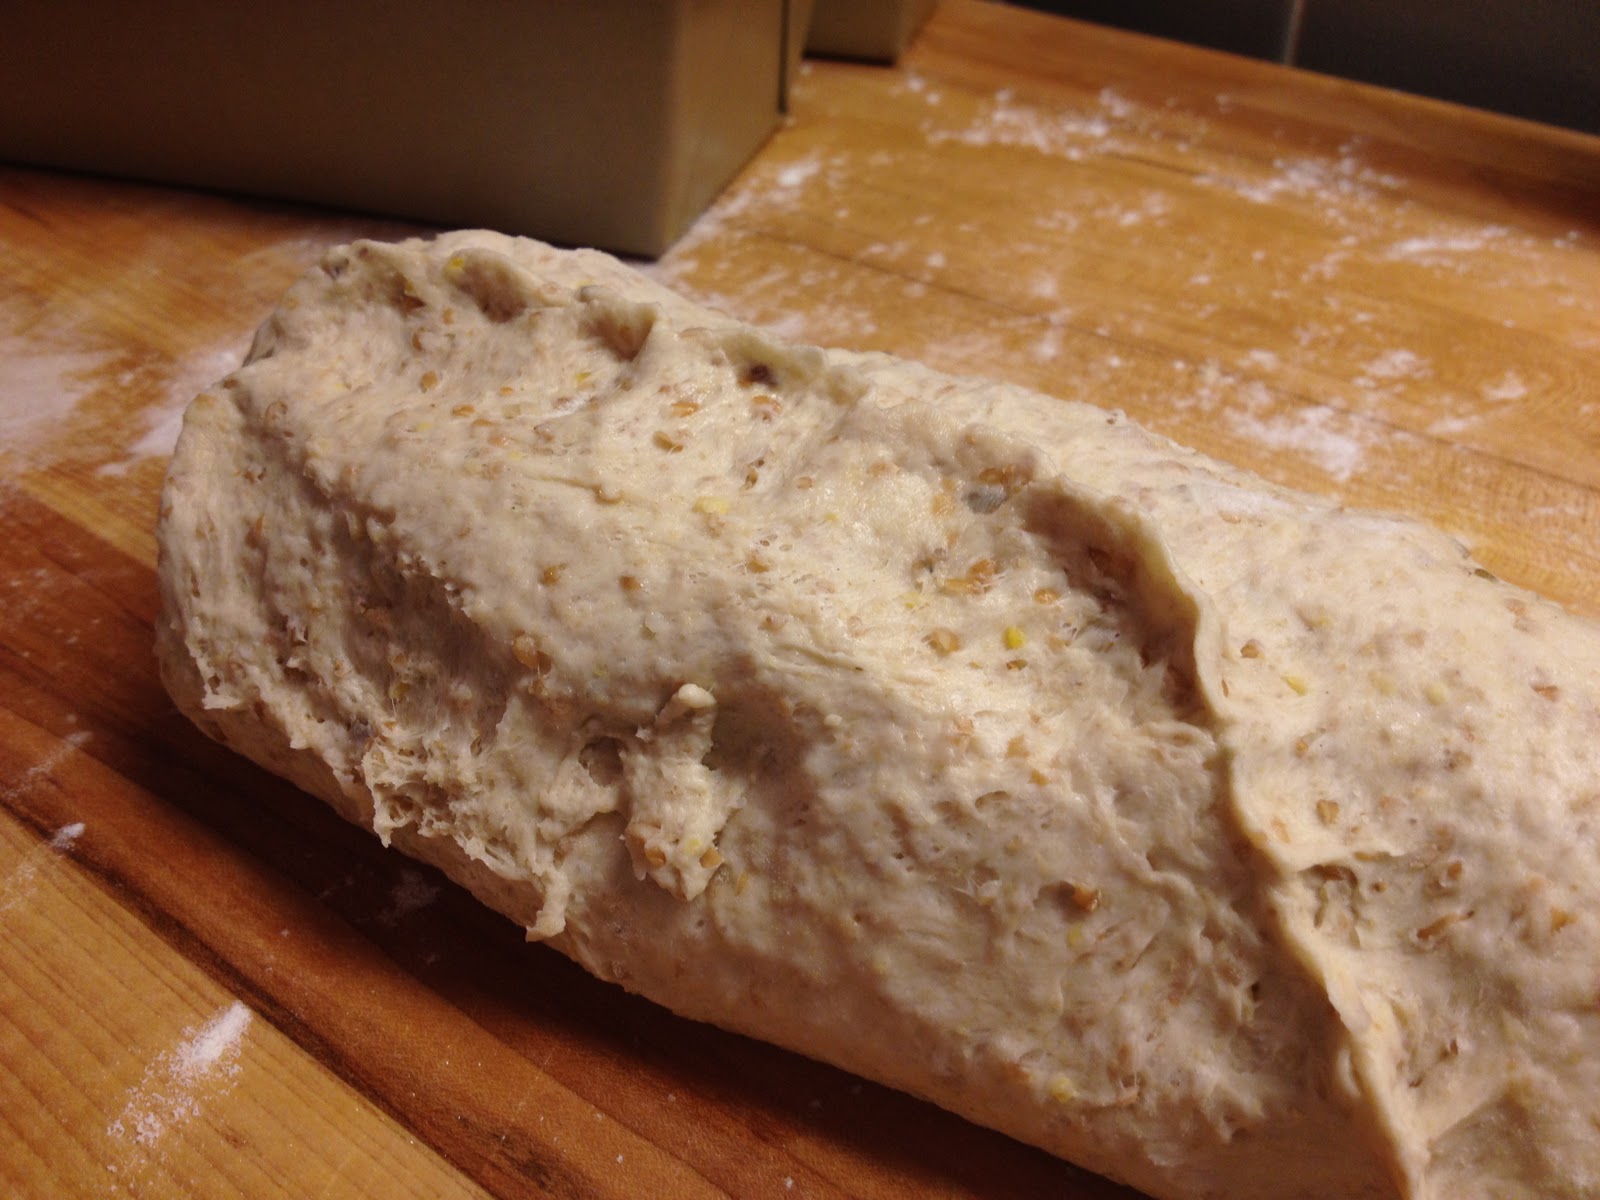
Transfer the dough to a floured work surface and fold it onto itself starting back to front, front to back, and then the sides.  Form into a ball and place in a lightly oiled bowl for 10 mins.  Repeat the folding process three more times for a total of four times.  After the last fold, form the dough back into a ball and place in a lightly oiled bowl.  Cover the bowl tightly with saran wrap and refrigerate for up to four days (at least 8-10 hours).

Pull the dough out f the refrigerator at least 4 hours before baking.  Shape the dough into a loaf and place on a lightly oiled sheet pan.  Spray dough lightly with oil, and cover to let rise.  Uncover dough about 15 minutes before baking and score with a knife.

About 30 mins before baking, place a deep metal pan into the very bottom rack of the oven, place the top rack in the middle positions, and turn the oven to 500 degrees.  Just before baking, pour 1 cup of water into the meta pan on the bottom rack and place the sheet pan with the dough on the top rack.  Bake for 35-45 mins until the dough reaches an internal temperature of 195 degrees and sounds hollow.


Let bread cool on a wire rack for at least one hour before slicing (preferably 3 hours).  I snuck in a taste as I was taking the photos and oh wow!  This is good sourdough bread.


Pin It

Wednesday, December 7, 2011

So What If I'm Too Cheap To Run The Heater Vegetable Soup

One of the things that I am known for is being super stingy about running the heater in the winter (and the air conditioner in the summer).  The only three exceptions are if company is coming over, if I am trying to make bread rise (yes, our house gets cold enough to prevent bread from rising), or if I can see my breath in the house.  With that in mind, I try my best to make other things perform double duty to help keep warm.  Things like waiting to do the laundry until the coldest part of the day, or baking more meals, or eating tasty soup :)

Soup is easy, quick, filling, and healthy (as long as it isn't loaded with sodium).  The soup I made for dinner last night was all of those things plus an added bonus of tasting amazing.

Ingredients:
1 T. Olive Oil
2 medium carrots (small dice)
2 stalks of celery (small dice)
1 medium yellow onion (small dice)
3 garlic cloves (minced)
1 t. dried thyme
salt and pepper to taste
2 15oz. cans of cannelli beans (rinsed and drained)
1 28 oz. cans diced tomatoes
4 c. low-sodium vegetable stock
1/4 c. fresh parsley (chopped)
grated parmesan cheese (optional)

Directions:
Heat olive oil a large pot on medium-high heat.  Add in the carrots, celery, and onions.  Cook until onions are translucent.  Add in the garlic, thyme, salt and pepper and cook until you can smell the garlic.  Add in the rest of the ingredients (beans, tomatoes, stock, parsley) and bring the soup to a boil then turn to low and simmer until vegetables are tender (20-25 mins). Serve the soup with a sprinkle of parmesan cheese on top.  Makes four servings at 300 calories each.

Other ingredients that would taste good:
Kale (added in with tomatoes)
Spinach (added in the last couple of minutes of simmering)
Garbanzo beans (in place of cannelli beans)
Zucchini (added in with garlic)
Potatoes (added in with carrots)

The best part is that it takes less than an hour to make :)

Pin It

Tuesday, December 6, 2011

OMG These Are Soooo Good Chocolate Chip Cookies


I have been mainly focussing my recipes on healthier food lately.  But I have to be honest and say that my husband and I do not eat uber healthy all of the time.  I wish I could say that, but we really just don't have the will power.  So we have instituted something called "Cheat Day".  This glorious day is what keeps our healthy eating habits alive.  One day a week we go a little crazy and then it is back on the bandwagon by Monday, in theory.  In actual practice, sometimes cheat day spills over into Monday.  This week has been a double-cheat week and with good reason:

OMG These Are Soooo Good Chocolate Chip Cookies

Sunday night at 11:30 pm my husband turns to me and says "I want some cookies!".  He knows that cheat day is about to end and he wants to squeeze in one last cheat.  Cookies sounded good to me so I obliged.  After a little bit of research, I came across what is in my apparently not so humble opinion, the world's best chocolate chip cookie recipe thanks to America's Test Kitchen.  I made it again last night for my friends and the response from them was "Oh My Gah.....! These are so good!".  So with two stamps of approval (we made them two nights in a row) I decided to post this not so healthy, but good for the soul recipe.  The ingredients are the same as any old recipe, but the ratios and execution make all the difference.


Ingredients:
2 c. flour
1/2 t. baking soda
1/2 t. salt
12 T. unsalted butter (melted and cooled slightly)
1 c. packed brown sugar
1/2 c. granulated sugar
1 large egg plus 1 egg yolk
2 t. vanilla
1 c. semisweet chocolate chips


Preheat your oven to 325 degrees and place the oven racks in upper-middle and lower middle positions and line two cookie sheets with parchment.  Using the paddle attachment on a stand mixer, mix butter and sugars on med-low speed until well blended. Turn the mixer down to low and add in the eggs and vanilla until they are roughly combined and then turn the mixer up to medium until well combined.  Turn the mixer to low again and add in the dry ingredients.  Once the dry ingredients are incorporated, add the chocolate chips until they are well dispersed in the dough (about 10-15 seconds).

Now these cookies are big!  I describe them as "Brian Size" appropriately named for my friend Brian who esteems quantity just as important as quality in his food.  So keep this in mind for the next step.

Click to enlarge ;)
Take a 1/4 c. of dough and roll it into a ball.  Then pull the ball into two equal pieces to create two balls with one side of rough surface.  Bring the balls back together, rough sides facing up to make one big cookie again.  Make sure that you do not compromise the structural integrity of the rough parts when you bring the dough back together.  The purpose of this step is to create a nice crumbly surface on the cookie, do not skip this step, it is so worth it.  These cookies put Mrs. Fields AND Pepperidge Farms to absolute shame.

Place dough balls on cookie sheets and give them plenty of space, at least 2 1/2 inches apart.

Bake until the cookies are lightly browned and the edges are a little crispy (about 15 minutes for gas ovens and 18 minutes for my jenky electric oven).  Switch and rotate the baking sheets half way through.

Now when these beauties come out of the oven, you will be tempted to eat them right away because they are soooo pretty.  You will also be tempted to put them on a cooling rack.  Don't do either of those things.  Take the cookie sheets out, place them on a heat-safe surface and leave them alone for as long as you can stand it  or 10-15 mins.

Good luck!  and feel free to post comments or questions if you have them.  For all my Church friends, I am bringing these to the Relief Society activity tonight so you can try before you buy :)

Pin It

Monday, November 28, 2011

Why I Love Yogurt of the Greek Variety

I love the versatility of greek yogurt; plain nonfat yogurt too.  I use them to replace sour cream and mayonnaise a lot.  And I also love to eat them as intended :)  Here are three recipes that show great ways to use yogurt to replace fattier ingredients.  These are staples in my diet and I know you'll love them.

Baked Potatoes:
Russet potato clean and poked with a fork
Plain nonfat yogurt
Your favorite salsa verde

Place the baked potato in a microwave safe glass bowl with a couple teaspoons of water.  PLace a plate over the bowl and cook on the baked potato setting or for about 5-6 mins.

Top the potato with a couple tablespoons of yogurt and salsa verde, salt and pepper to taste.

This was my favorite meal in college and a great quick goto for dinner or lunch.  Depending on the size of the potato, this meal clocks in around 240 calories.  I don't recommend trying this out with sweet potatoes.  Sweet potatoes and yogurt are not friends as far as I can tell.

Chicken Salad Melt Open-Faced Sandwiches:
1x can of chicken or 1 chicken breast chopped into small pieces or tuna if that's your thing
1 T. dijon mustard
1/4 c. greek yogurt
1 oz. grated cheddar cheese
1 stalk of celery (chopped into small pieces)
Pepper to taste
4 slices of whole wheat bread (plain or toasted)

Mix chicken, mustard, yogurt, cheese, celery, and pepper in a bowl until well combined.  Spoon over slices of bread.  If you have a toaster oven, you can toast these on the highest setting until they get all melty.  I like them cold.  This recipe makes four open-faced sandwiches.

I made this for lunch today, soooo good.  It is a great way to use those packages of canned chicken you buy from Costco for food storage and only costs about 200 calories per sandwich :)  Eat them with your favorite soup or a salad and you have yourself a very fulfilling and super nummy meal.

Yogurt with Granola and Sugar-Free Jam:
1/2 c. Greek Yogurt
1/3 c. granola
1 T. sugar free jam

Use your favorite granola and sugar free jam.  We really like the mango-passion granola from Trader Joe's and pear jam.

The protein in the yogurt makes a great breakfast that will sustain you all the way to lunch for only 189 calories :)

Other Uses:
Replace sour cream with greek/plain yogurt in tacos
Use greek yogurt in mashed potatoes instead of butter and milk


Sunday, November 27, 2011

Mother Starter Success!

I actually read the directions this time and managed to create a successful mother starter.  The trick was not to put it by the window :)~  Here are the instructions for creating a purist mother starter:

Seed Culture
Phase 1:
In a small glass or plastic bowl, combine 1/4 c. filtered water or unsweetened pineapple juice with 3 1/2 T. whole wheat or unbleached white flour. (I used filtered water and white whole wheat flour).

Cover the seed culture with plastic wrap and leave it at room temperature for two days.  Come back and stir the culture with a wet spoon two to three times each day.  I kept track or my stirring by writing on the plastic wrap with a permanent marker.

Phase 2:
Add 3 1/2 T. flour (white or whole wheat) plus 2 T. filtered water and stir to combine.  Put the plastic wrap back on and let sit at room temperature for 24 to 48 hours or until mixture becomes very bubbly (It kind of looks like a pancake around flipping time).  Again, make sure to stir the mixture 2 to 3 times each day with a wet spoon.

Phase 3:
Add 7 T. flour plus 2 T. filtered water and stir with a spoon.  Place the mixture into a larger bowl and cover with plastic wrap.  Let the mixture sit for 24 to 48 hours making sure to come back at least twice a day to sitr the mixture with a wet spoon (this process aerates it and makes sure that mold doesn't form).

The mixture should be very bubbly and expanded after after 48 hours.  If it does not do this, wait another day or two, continuing to stir a couple times per day.  If your house is very warm, it could take less than 24 hours.  If it does, move to the next phase immediately.

Phase 4:
Seperate the seed culture into two 1/2 c. portions.  Throw half away or give it to a friend :)  Add 10 1/2 T. flour plus 2 T. water to 1/2 c. seed starter.  Cover with plastic wrap, let sit for 4 to 24 hours until it doubles in size.  If your starter doesn't rise after 24 hours, let it sit at room temperature until it does and aerate twice per day.

At this point, you can either turn the seed culture into a mother starter or place it in the fridge for up to 3 days.

Mother Starter
Split the seed culture into two equal portions again (each portion should be about 3/4 c.).  Throw out half of the seed or give it away to a friend, or save it to make a backup mother starter.

Combine 2 3/4 c. flour, 1 c. water, and 3/4 c. of the seed starter together in a stand mixer fitted with a dough hook.  Mix on low until it forms a smooth ball.

Place the starter in a clean, lightly oiled nonreactive container.  I used a ziplock gallon bag, make sure not to close the bag completely so the gas can escape.  Leave the starter out at room temperature for 4 to 8 hours or until it has doubled in size.

Degas the starter by kneading it a little.  Close the bag completely, or cover tightly and place in the refrigerator.  After a few hours, release any gas that may have built up.

Refreshing the Mother Starter
The starter will be good for up to 5 days.  After that, you would have to refresh it.  The easiest way is to take 4 ounces of the starter and repeat the mother starter instructions above.

Good luck!  I will post some recipes for the starter in the next couple of days.


Thursday, November 17, 2011

Tortilla Epiphanies and The Worlds Easiest Shredded Beef Tacos

Sometimes I will be perusing the aisles of Costco, eye the Pico, and a smile will appear across my face.  This means that I have had a wonderful idea that the time is right for Shredded Beef Taco Night.  This glorious occasion was invented while I was in college and is therefore inherently an easy meal to prepare.  It is so good, that I can attribute it as one of the reasons my husband fell in love with me and decided I should be his girl forever.  Because we all know that the way to a man's heart is through his stomach.  This is especially true with my hubby.

Anyhoo, tonight was not only another amazing night of shredded beef goodness, but also proved to be a momentous occasion in the history of this meal. A day that we will all look back on as the day Nicole made her first homemade tortillas and never bought packaged ones again.

So here are my recipes for an epic (I hope I am not giving this too much hype) and easy shredded beef taco night......

Please note, that preparing this meal my way means owning two crock pots, one big one, and a little one.    If you don't have two, then you can just simmer the beans on the stove according to the package directions.

In order of preparation...

Pinto Beans (start this the night before):
1 bag of dried pinto beans, rinsed and picked through
1 small crock pot (about an 8 c. capacity)
water
salt
whatever else you like to put in your beans (jalapeno, onion, garlic, pepper, limes, etc.)

Soak the beans in the crock pot over night.  In the morning, empty out the soaking water, rinse the beans,  and add in 6 cups of new water and salt according to preference.  Cook on low until dinner (about 8-9 hours).

Note: I usually also add in dried onion and garlic and squeeze in two limes.  I bet a bay leaf would also add some good flavor and maybe even some chili powder or cumin.  The idea is to put in whatever you want to flavor your beans.  I usually also add in some cilantro just before serving.

Shredded Beef:
1 chuck roast (or pork shoulder) with extra fat trimmed off
1 big container (or two small ones) of pico de gallo (I really like the pico from Costco, but you can make your own if you are feeling like an over achiever)

In the morning, throw the chuck roast in a crock pot (don't literally throw it unless you are having a bad morning) and dump the pico on top.  Cook on high until dinner (about 8-9 hours).  Pull the roast out and shred it with two forks just before serving.

Corn Tortillas:
Now for the best part, Tortillas.  I usually buy my tortillas from the store.  What a foolish mistake!  It is ridiculous how easy it is to make corn tortillas and how much better they taste than store bought.  Here is the ridiculously easy recipe:

2 c. masa harina (corn flour)
1 1/2 c. hot water (This amount depends on where you live, drier climates may need more water)
1 lime (zested and juiced)
1/2 t. salt

Mix all of the ingredients together in a medium sized bowl (The dough should be firm springy and not dry or sticky), cover and let rest for one hour.  Separate the dough into 12 equal sized balls.  Place each ball between two pieces of wax paper or parchment sprayed with pam.  Roll the dough out into 6 inch circles.  I used 1/8 inch evendough bands on my roller to make sure I did it right.

Once all the dough is rolled out, cook each tortilla for about a minute on each side in a pan preheated on med-high (cast iron is best, but I used an enamel pan and it worked just fine).  Keep tortillas in an aluminum foil pouch until ready to eat.  To make an aluminum foil pouch, take one big piece of aluminum foil and fold it in half and then fold in the sides a little bit :)


Rice:
My husband loves rice flavored with lime.  I am not much of a rice person, but I make it to make him happy.  So for the rice, make as much brown rice as you might need for your family following the instructions on the box adding in some dried garlic and onion with the cooking liquid.  At the fluff with a fork stage, add in some lime zest, lime juice, and chopped cilantro.  Yummy!


Condiments:
Now for the condiments.  Obviously, you are going to put whatever it is you like on your taco, on your taco.  But here are some suggestions to keep it low-cal and still yummy:

1. Substitute sour cream for greek yogurt (believe me, you wont even miss the sour cream)
2. Substitute the cheese with avocado or guacamole
3. Dabble on some salsa verde
4. Sprinkle chopped cilantro on that baby
4. Add a squeeze of lime on top

This meal clocks in around 700 calories (two tacos).

Tuesday, November 15, 2011

Good and Good For You Banana Bread

My husband has a funny....quirk? I guess you would call it that.  Whenever we go the the store, he insists that we buy bananas.  The reason this is a funny quirk is because he never eats a single one.  He always says that he plans on eating them, but I really think that he just wants them to go overly ripe and force me to make banana bread, which I do.

I was recently discussing this with his sister and my overall plight to eat "clean" and she mentioned a wicked awesome banana bread recipe that she had come across.  She sent it over and I gave it a try, adding in a couple tweaks here and there:

Ingredients:
1 1/2 c. whole wheat flour or white whole wheat flour
1 t. baking powder
2 t. cinnamon
1/2 t. bakind soda
1/2 t. table salt
1 T. ground flax
2 T. water
9 T. agave syrup
1/2 c. greek yogurt
1/2 c. canola oil
1 c. mashed ripe bananas (about 2 bananas  you can probably mashed them in your mixer before adding in the other ingredients and save dirtying other utensils with which you would mash bananas)
2 t. vanilla extract
1/4 c. chocolate chips

Preheat oven to 325 degrees and spray bottom of 8x 4 inch loaf pan or muffin tin or mini bread loaf pans ( I use them all because I quadruple the recipe since I usually have an entire bunch of bananas to get rid of).

In the bowl of your stand mixer add in the, flax, water, agave syrup, yogurt, oil, banana, and vanilla and mix on med-low until combined.  Add in the flour, baking powder, cinnamon, baking soda, and salt and mix until almost combined.  When your mixture is almost combined, add in the chocolate chips.  You don't want to form too much gluten, so make sure you mix it as little as possible to get everything together.  Gluten formation = tough and chewy.  You may want that in a baguette, but not in your banana bread.  So tell that gluten to chill out and wait until your feeling frenchy.

Pour the batter into your prepared pan.  If you are making muffins or mini bread loaves, fill each one until it is about 2/3 full.

Bake big loaf for 60-70 mins, muffins or mini loaves about 30 mins until a toothpick inserted comes out clean.

The result is moist, tender, yummy, and not too sweet and only 90 calories per slice if you slice it up super thin :)  For the muffins, it is about 134 calories, mini loaves will depend on the size of pan you use.


Sunday, November 13, 2011

Going Vegan and Blueberry Streusel Muffins

Am I converting to Veganism?  Absolutely not!  While I deeply respect other's decisions to do so, I do not personally have the will power to give up steak for good.  But, I think it is a good idea for both my health and the planet to incorporate at least a couple non-meat meals in my diet per week.  So I bought a vegan cookbook from Costco that looked pretty interesting and started going at it.

I brought some vegan blueberry muffins to a crafting activity yesterday and they seemed to be well-liked (I know I liked them) so I feel I should share.  What is great about these muffins is that they are not overly sweet or oily.  Which means they don't give me heartburn.  So if you like yourself a super sweet, oily muffin, you have come to the wrong place my friend:

Muffins:
1 1/2 c. whole wheat pastry flour (I use white whole wheat flour from trader joe's, it's cheaper)
2 t. baking powder
1/2 t. baking soda
2/3 c. soy milk (plain)
1 t. vanilla extract
1/3 c. orange juice (I used no sugar added grape juice)
1/3 c. canola oil (while I sued canola oil, I feel this could be replaced with unsweetened apple sauce, so I am going to try that)
1/2 c. sugar (I am not supposed to have sugar, so I use agave syrup making sure to account for the sweetness difference)
1 c. fresh blueberries

Streusel Topping:
2 T. brown sugar
1 T. sugar
2 T. Whole Wheat Flour
2 T. vegan margarine (I am going to try to omit this on my next tray by using agave syrup instead of sugar and then no lipid)
2 T. old-fashioned oats
1 t. cinnamon

Preheat oven to 400 degrees, spray muffin tins or line with muffin cups and set aside.

In a large bowl, combine all of the ingredients except for blueberries, and stir until just barely combined. Fold in blueberries just before filling the muffin tins.

In a small bowl, combine all of the streusel ingredients and with a fork until everything is mixed and crumbly.

Spoon the batter into muffin tins until they are 2/3 full, top with 1 teaspoon of streusel.

Bake for about 20 mins, or until a toothpick comes out clean.

If you follow the original recipe, the muffins are 173 calories each.  Not sure about my frankensteined version, but it is probably pretty close to the same.

The original recipe can also be found on the peas and thank you blog.  This woman is a genius, I recommend reading her blog and buying her cookbook.

A little back story and multigrain bread

Pin It

I found out pretty recently that I have PCOS which has a number of symptoms including making it very difficult for me to lose weight.  Having PCOS also means that I basically have to lose weight, so interesting dilemma I am facing here.  It also also means that in order for me to lose weight I   have to severely cut back on anything that is easy for my body to breakdown. So fun......

I already went through all of the stages of denial and have finally reached acceptance.  So here I am, doing what I can to make the best of a super lame situation.

I have been sharing a multigrain bread recipe with some friends and neighbors and they all seem to like it, so I decided to share (my apologies to Steph for not getting this up sooner):

Ingredients:
1 1/4 c. seven-grain hot cereal mix (you can also use 10 grain, the only one I have found is by Bob's Red Mill.  You can find it in the oatmeal section or in bulk foods.  It basically looks like steel cut oats)
2 1/2 c. boiling water
4 T. honey
4 T. unsalted butter melted and cooled (optional)
2 1/2 t. instant yeast
3 c. unbleached all purpose flour, plus more for dusting
1 1/2 c. whole wheat flour
1 T. table salt

Optional Ingredients:
3/4 c. unsalted pumpkin or sunflower seeds
1/2 c. old-fashioned rolled oats

I use a Kitchenaid to make just about everything and I highly recommend getting one, they happen to be on sale at Costco right now.
In the mixer bowl, place cereal and boiling water and fit with dough hook.  To boil my water,  I just stick it in a pyrex measuring cup in the microwave for 8 minutes.  Let the mixture sit in the bowl for about an hour until the temperature goes down to 100 degrees.  Go back to it once or twice to give it a stir.

Add in the honey, butter, and yeast and turn the machine onto low for about half a minute. Add in flours half a cup at a time while mixer is still on low.  The original recipe tells you to whisk the flours together ahead of time, but I am too lazy to get out another bowl so I just alternate 1 c. white flour with 1/2 c. wheat flour three times :)

Let all of that mix for about 2 minutes and then cover the bowl with plastic wrap and let it rest for 20 mins.

After naptime, remove the plastic wrap, add in the salt, and mix on medium-low until the dough clears the side of the bowl (about 3 to 4 minutes).  Add more flour if a tablespoon at a time if the dough still sticks.  Continue mixing for 5 minutes longer.

The original recipe calls for pumpkin seeds and rolled oats, but I have found that they add no extra flavor and only extra calories, so I omit them.  But if you really want to get your pumpkin seed action on, do it now! and knead the dough for 15 more seconds.

Take the dough out onto a floured work surface and knead into a smooth ball.  Place the dough into a large bowl that has been sprayed with Pam.  I put the dough in right side down and then flip it so that I can get some PAM on the top of the dough and it wont stick to the plastic wrap.  Cover the bowl with plastic wrap (I use the sheet from earlier throughout the whole process).

Let the dough rise for 45 to 60 minutes.  When that's done, take the dough out onto floured work surface and pat it out into a 12 by 9 inch rectangle.  Cut the dough in half to make two 6x9 inch pieces.  Starting at the farther end, roll the dough into a tight log and pinch the seams.  Repeat with second piece of dough.

If you would like to sew your wild oats at this time, spray the loaves with water or pam and roll them in the oats.

Place the loaves into two 9 by 5 inch loaf pans that have been sprayed with PAM.  Press the dough gently into the corners.  Cover the pans with plastic wrap and let rise for 30 to 40 minutes.  Preheat your oven to 375 degrees about 20 minutes before the dough is ready to be baked.

Remove plastic wrap and bake the bread loaves until they reach an internal temperature of 200 degrees (about 35 to 40 mins).

Now for the hardest part, remove the loaves from the pans and place them on a cooling rack for 3 hours before slicing.  You will go insane because this bread smells amazing, but you must resist the urge.

Slice it up!  If you go with quarter inch slices, it's about 70 calories per slice.  I love to toast my bread and eat it with almond butter and some homemade, sugar free jam. Yummy!

Based on 22 slices per loaf
Pin It

What the cereal packaging looks like

Tuesday, May 24, 2011

New Resolution

I recently started cooking again.  I am not sure why I ever stopped.  If it was due to buying our house or too much work, who knows?  Probably too much work.  Anyway....I have rekindled my love for cooking/experimenting with food yet again (hooray!) and have come up with some pretty yummy stuff.  So I figured I would share.

Tonight's dinner was pretty darn tasty so here are the recipes:

Caprese Salad:
This one is pretty easy, buy yourself some fantastic fresh buffalo mozzarella (Costco has a pretty decent one, you want the stuff that comes in the water), pick some basil from your herb garden, and slice up some vine ripened tomato.  Drizzle with olive oil and spread around some fresh cracked pepper.  If you are feeling really fancy, pour some balsamic vinegar in a pot and boil until it lightly coats the back of a spoon.  Voila! you have a sweet and tangy balsamic vinegar reduction to add to your salad.  Just a couple drops here and there should do the trick.

To go with the super easy caprese salad, slice up some sourdough into thin 2 inch pieces, drizzle it with copious amounts of extra virgin olive oil, sprinkle on some garlic powder, salt, and pepper and bake in an oven at 375 for 15-20 mins.  Now you have a beautiful platform upon which you may eat your salady goodness.  I cut some of the bread into smaller pieces and made it into garlicy croutons for my soup which was.....

Pureed Carrot Soup:
Take about 4 carrots peeled and sliced and throw them into a saute pan with some olive oil and a quarter of a diced onion.  Saute them on medium high until they caramelize a bit.  Add in two cloves of garlic at the end and let it cook until you can smell the garlic in the pan. Next, dump all of that into a blender with 2 cups of hot chicken stock, blend and salt and pepper to taste.

It creates a super creamy, low fat yet hearty soup.  Sprinkle your croutons on top and you are set.

Lastly, saute another diced quarter onion with  3 sliced carrots in olive oil.  Add in a clove of garlic, diced small after everything else has turned yummy and brown.  When you can smell the garlic, add in one can tomatoes, a tablespoon of sugar, salt and pepper.  Let that stew for about 10 to 15 minutes then attack the sauce with a potato masher.  Once everything has been smashed into tiny bits, add in a handful of diced fresh herbs (Mine consisted of chives, marjoram, thyme, basil, oregano, and parsley) and a very generous handful of finely grated parmesan cheese.  Mix it up with about a quarter cup of olive oil and pour it over a half pound of whole wheat spaghetti.

Here's a good cheese tip.  I buy my cheese from Costco.  Which means, in bulk.  The way I keep it from going bad is by cutting up the cheese into smaller chunks and feeding it through the grater plate on my food processor.  I then take the gigantic amounts of cheese and store it in freezer bags, and throw it in my freezer.  When I need cheese, I just pull it out and sprinkle away.  It usually doesn't stick to itself, but if it does, you can bang the bag on the counter a couple of times to loosen it up.

Now you may ask yourself, "why doesn't she just buy pre-shredded cheese?"  The answer is that it is more expensive and just as easy to take five minutes to shred it myself.  I also do this with hamburger and turkey meat so that I know what is really going in my burger.  You just cut up the meat into 1x1 cubes, freeze for 10-20 mins and then pulse it in the food processor.  It makes perfectly ground meats with no mystery.